This is the fourth and final part of a post showing the typical steps required to install and configure a medium sized SharePoint Server 2010 farm.
Other pages of this post include:
- Part 1 – General Notes and Installation Accounts
- Part 2 – WFE Server Installation and Configuration
- Part 3 – Application Server Installation and Configuration
Service Account Configuration
Now that the Web Front End (WFE) and Application servers have been installed and configured, the next step is to correctly configure the service accounts.
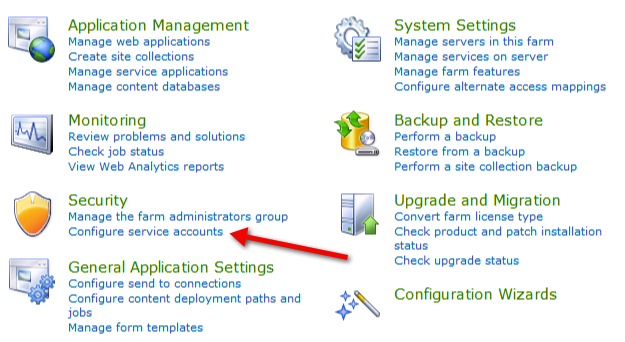
Open the Central Administration site and click the Configure service accounts link.
From this page you can specify the domain user account that each service should run as. The available services that you can update the credentials for include:
- Farm Account
- SharePoint Foundation Search
- SharePoint Server Search
- User Profile Synchronization Service
- Web Application Pools
Update the account for each service to match those created in line with the table in the Active Directory Accounts section of part one of this post.
Search Service Configuration
This section describes how to configure the search service.
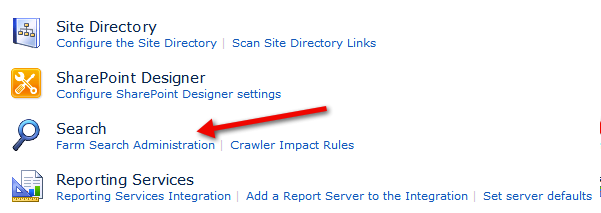
To manage the search service, go to the Central Administration site and click the General Application Settings link. On the next page, click the Farm Search Administration link.
Next, click on the link to the Search Service Application, which will load the Search Administration page.
The changes that should be made include specifying the default content access account, which is described in the Service Accounts section. To do this, click on the link to the right of the Default content access account heading.
Then within the popup window, enter the domain user account credentials that should be used.
To update the contact email address, this time click on the link to the right of the Contact e-mail address heading and enter the address in the popup dialog.
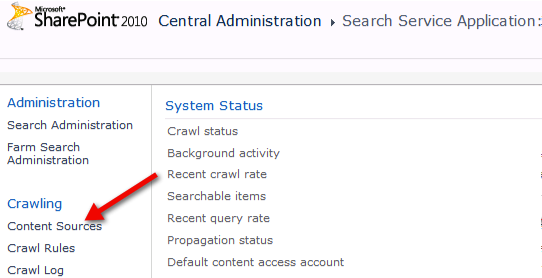
A content crawl schedule is not configured by default. Click on the Content Sources link, to configure this.
Then on the next page, click the Local SharePoint sites link.
From the resulting page, scroll down to the Crawl Schedules section. From here you can specify full and incremental crawl schedules for the local SharePoint site content.
To create a schedule for full crawls, click the Create schedule link immediately below the Full Crawl drop down list. Next, do the same for the incremental crawl. Ideally you want the full crawl to run once every day and the incremental to run every 30 minutes, of course this depends on the volume of data that will be crawled and how important it is to your business that content becomes visible via searches after approval\submission.
User Profile Service
Before configuring the user profile service, the first step is to ensure the synchronisation service has started. To do this, launch the Central Administration site and click on the Manage services on server link.
Also, ensure the selected server is the application server before continuing and then locate the User Profile Synchronization Service entry in the list. To the right of the entry is a link titled Start, click it to continue. If it has already started you can ignore the rest of this step and continue from the next heading – Configure User Profile Service.
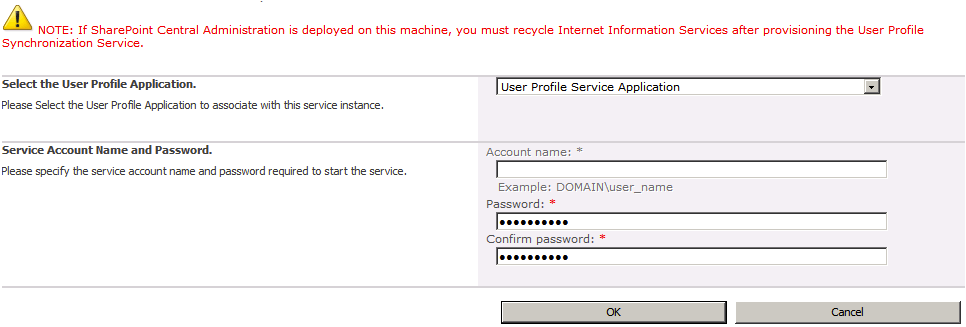
Enter the domain user account to run the user profile service under. This is described in the Service Accounts section of this post
Click the OK button to apply the changes.
After applying the changes, perform an IIS reset on the server and then return to the homepage of the Central Administration site. Under Monitoring, click the Check job status link.
On the page that loads, under the Running section, look for an entry titled ProfileSynchronizationSetupJob. It should have a status of running. Refresh the page every minute or so until the job has completed.
Next, go back to the list of services and wait until the User Profile Synchronization Service entry has a status of Started before continuing.
Once again, perform an IIS reset.
Configure User Profile Service
To configure the user profile service, launch the Central Administration site and click on the Manage service applications link.
From the list of services, locate and click the link titled User Profile Service Application.
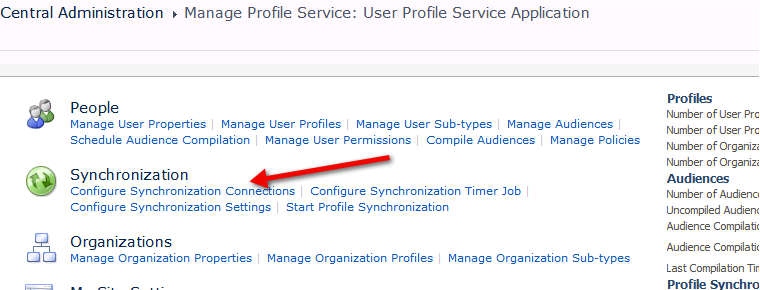
On the next page, click the Configure Synchronization Connections link.
Click the Create New Connection button. This will load a new synchronization page for the user profile service application.
Give the connection a name. The name you give is not important.
Enter the domain controller name in the Forest Name text box.
For the account, enter the User Profile Sync account, the same as that used when configuring the user profile service account from earlier.
Next, press the Populate Containers button, select the containers you would like to synchronise and press OK. Ensure that you select only the users you want to synched otherwise it may take a long time to complete.
Again, perform an IIS reset on the server.
The last step for this configuration is to start a full profile synchronisation. To do this, go back to the User Profile Service Application page – Central Administration -> Manage service applications -> User Profile Service Application.
This time, click the Start Profile Synchronization link.
Change to Start Full Synchronization and click the OK button.
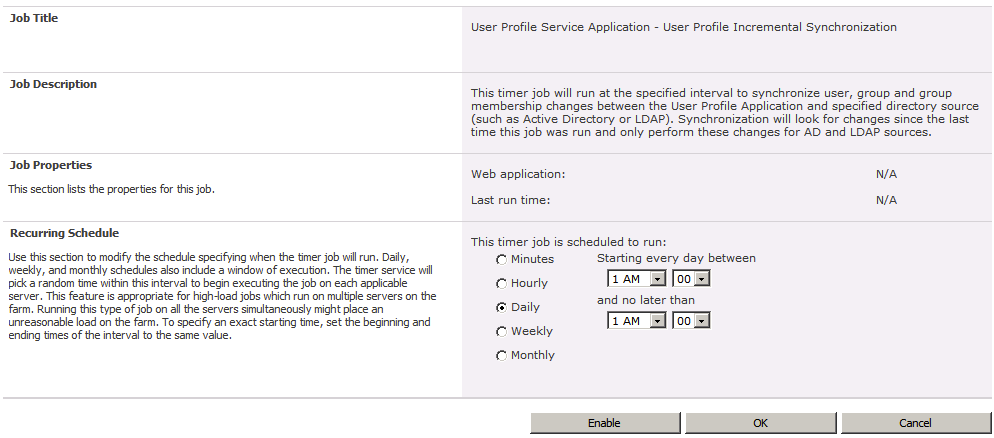
The final step in the configuration of the user profile service is to setup the timer job. Do this by clicking on the Configure Synchronization Timer Job link from the User Profile Service Application page.
By default, the timer is setup to run at 1am every day. If you want to change it, this is the page where you can modify it.
Either way, click the button titled Enable to enable the synchronisation timer.
Outgoing Email
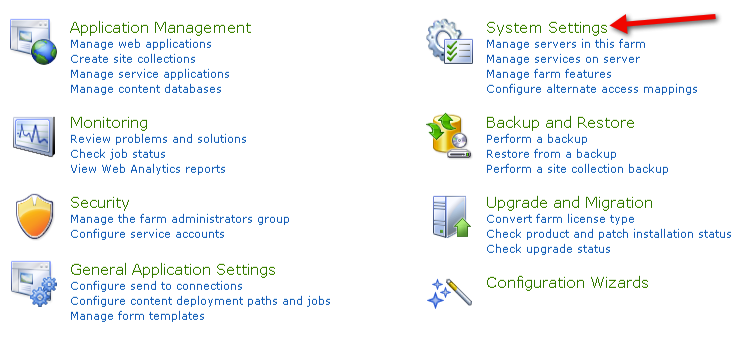
To manage the outgoing mail configuration, go to the Central Administration site and click the System Settings link.
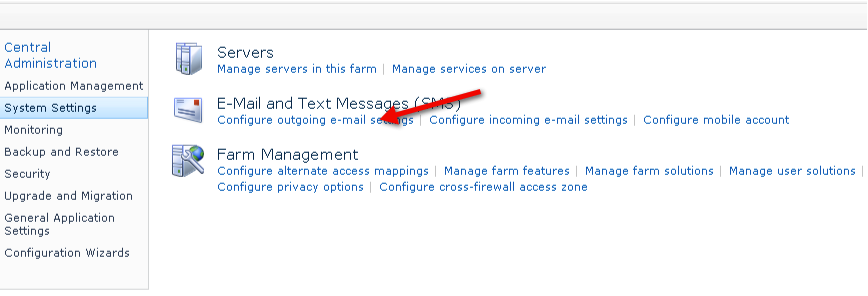
Next, click on the Configure outgoing e-mail settings link.
In the Outgoing Email Settings page, enter the relevant details for your environment.

