
This post describes how to deploy a web browser compatible InfoPath form, with code-behind, through a SharePoint feature.
Installing and registering an InfoPath form, along with a custom content type is pretty straight forward once you know the required steps.
Start by creating a content type that inherits from the Forms type. The following is a sample content type’s markup.
<?xml version="1.0" encoding="utf-8"?> <Elements xmlns="http://schemas.microsoft.com/sharepoint/"> <ContentType ID="0x0101010076AEDEA7CA2A44B59ECB3D491618E052" Name="Custom Form CT" Group="Custom" Inherits="TRUE" RequireClientRenderingOnNew="FALSE" Version="0"> <FieldRefs> </FieldRefs> <DocumentTemplate TargetName="/FormServerTemplates/CustomForm.xsn" /> </ContentType> </Elements> |
The important sections from the above markup are the ID and RequireClientRenderingOnNew attributes.
For your new content type to be usable in a Forms library (or for that matter the XmlFormView class) and use a web compatible InfoPath form it must inherit from the Form content type, which has an ID of 0x010101. To inherit from this all you have to do is add two zeros and then your own identifier.
The second attribute, RequireClientRenderingOnNew, specifies if the browser should use the application specified by the ProgId attribute (not shown here as it’s inherited from the parent content type) when creating or viewing a form. By default this is set to true, setting to false will configure the content type to render the form in the browser, using the FormServer.aspx page that’s located in the LAYOUTS folder.
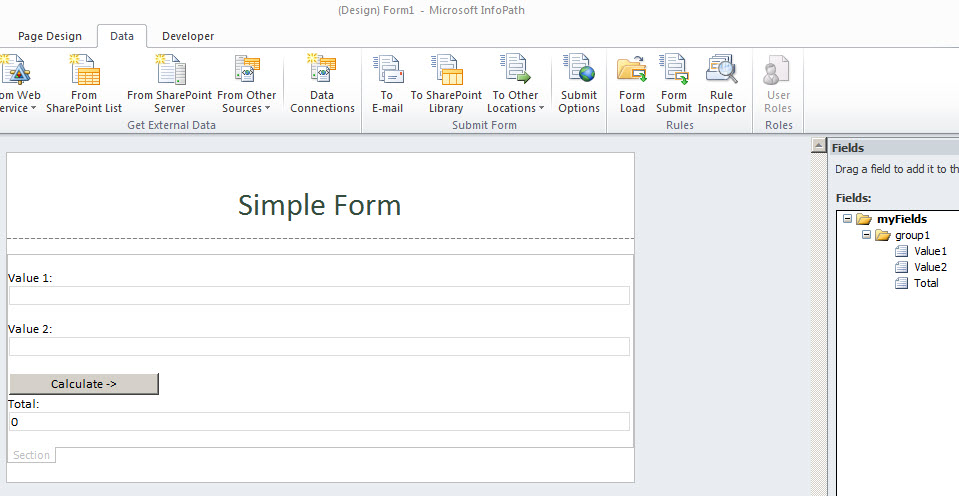
The next step is to create your InfoPath form. For this example, I’ll create a very simple form with some custom code.
Start by opening InfoPath and add three text boxes of integer type and a button control:
Now to configure the form for web browsing and add some code-behind.
Select the Home tab and then click Advanced form options:

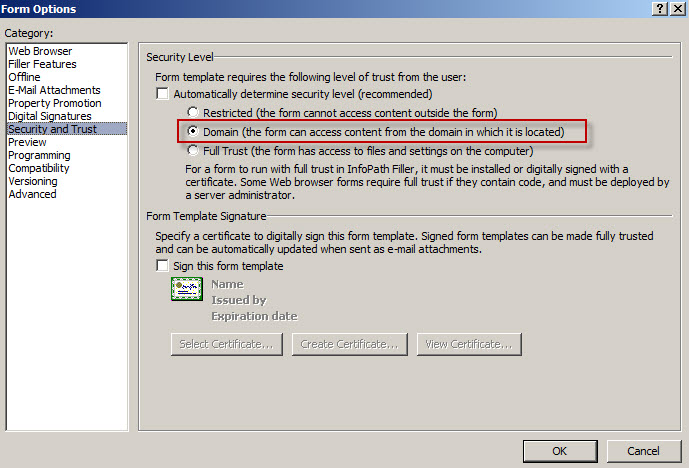
The first thing you need to configure is the security and trust level to Domain. This grant the form adequate permissions to be able to deploy it as part of a SharePoint solution.
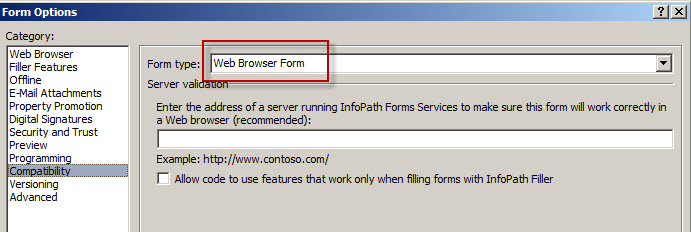
Next, ensure the compatibility of the form is set to Web Browser Form:
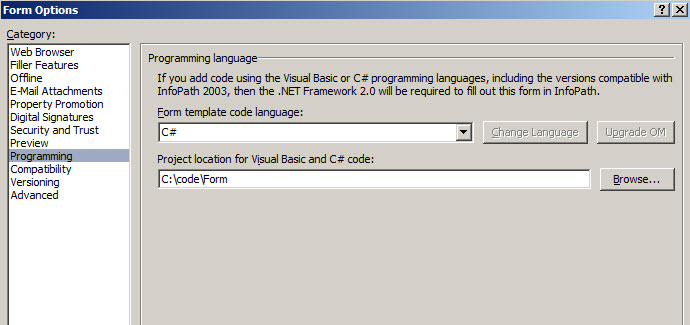
Finally, select your code preference and location:
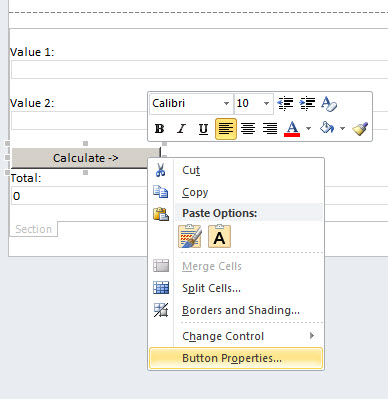
Back in the form, right click the button control and select Properties:
 .
.
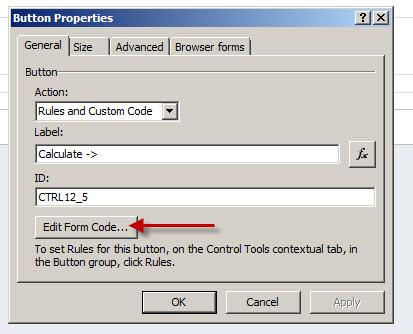
Then, click Edit Form Code in the popup dialog:
This will load Visual Studio Tools for Applications with a method for capturing the button click event:
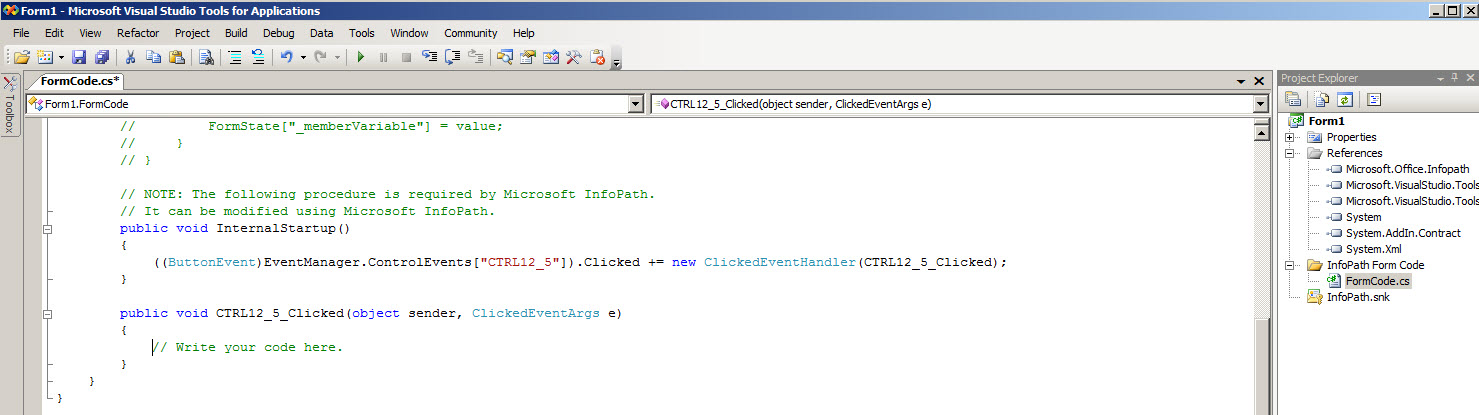
Add the following code to this method
XPathNavigator value1Node = MainDataSource.CreateNavigator().SelectSingleNode("/my:myFields/my:group1/my:Value1", NamespaceManager); XPathNavigator value2Node = MainDataSource.CreateNavigator().SelectSingleNode("/my:myFields/my:group1/my:Value2", NamespaceManager); int value1 = value1Node.ValueAsInt; int value2 = value2Node.ValueAsInt; XPathNavigator totalNode = MainDataSource.CreateNavigator().SelectSingleNode("/my:myFields/my:group1/my:Total", NamespaceManager); int total = value1 + value2; totalNode.SetValue(total.ToString()); |
Simple code, but just to demonstrate deploying a form with code-behind.
Save and close VSTA and return to the form.
Now to publish the form from InfoPath. Select the Home tab, Publish and then click Network Location:
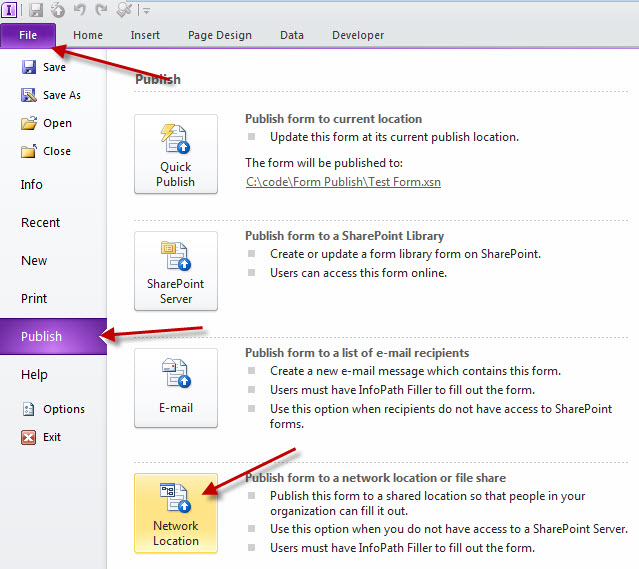
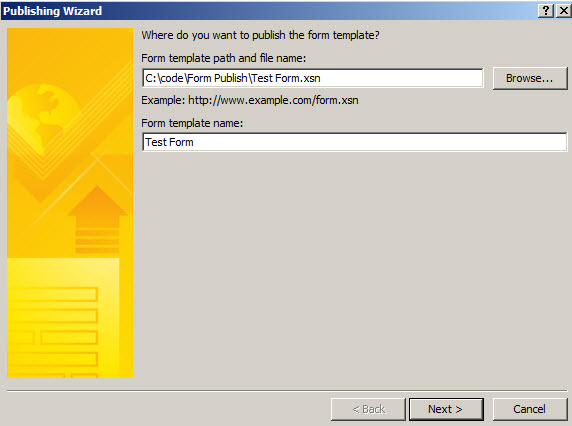
Select a location to publish the form (not the same location as the current form) and give it a name:
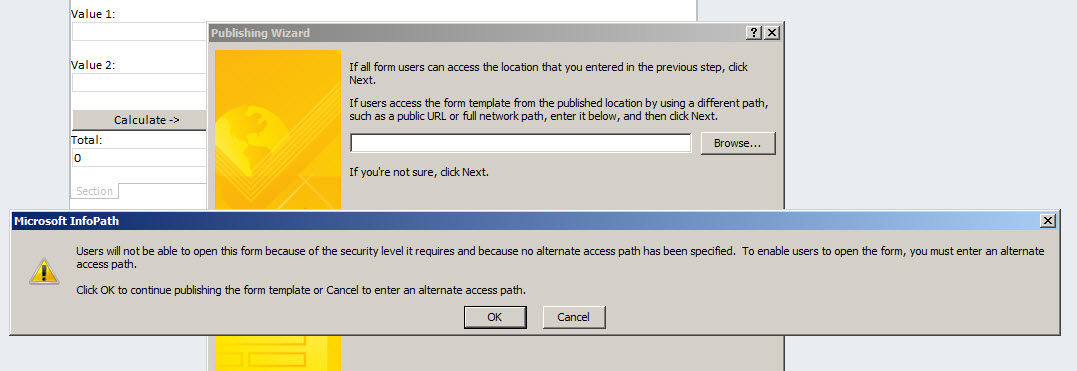
Click Next and clear the text from the text box, click Next again and OK to the warning.
To finish click Publish and then Close. Close InfoPath and open your Visual Studio SharePoint project, or create a new one.
From within your SharePoint project, you’ll need to add the published InfoPath form and configure a feature to correctly deploy it. To add the form, create a new module, deleting the Sample.txt file that it automatically creates. Add the published form to this module. Your module’s elements XML file should now look something like the following:
<?xml version="1.0" encoding="utf-8"?> <Elements xmlns="http://schemas.microsoft.com/sharepoint/"> <Module Name="FormsModule" Url="PublishedForms" RootWebOnly="TRUE"> <File Path="XSN\testform.xsn" Url="testform.xsn" Type="GhostableInLibrary" /> </Module> </Elements> |
Now that you have your form and have added it to your project, the next thing you should do is change the deploy location for the xsn file. This is an important step, as the InfoPath feature receiver (mentioned in the next paragraph) will only look in the root folder of the feature for candidate files and by default when you add a file to a module it is deployed to its folder. To do this, select your xsn file in the Solution Explorer, then bring up the Properties pane.

XSN Properties
Expand the Deployment Location node and clear the Path attribute. This will change the deployment location for your xsn file to the root of the relevant feature.
Next, add the assembly for the compiled InfoPath form to your project at the same location as the form. This will be in the bin folder of the location you specified as the code location for the form.
Do the same for this file as you did for the form and clear the Deployment Location node.
Your elements XML should now look something like:
<?xml version="1.0" encoding="utf-8"?> <Elements xmlns="http://schemas.microsoft.com/sharepoint/"> <Module Name="FormsModule" Url="PublishedForms" RootWebOnly="TRUE"> <File Path="testform.xsn" Url="testform.xsn" Type="GhostableInLibrary" /> <File Path="Form1.dll" Url="Form1.dll" /> </Module> </Elements> |
We don’t need the assembly deployed to the PublishedForms library, so remove that line from the Elements file, so you end up with:
<?xml version="1.0" encoding="utf-8"?> <Elements xmlns="http://schemas.microsoft.com/sharepoint/"> <Module Name="FormsModule" Url="PublishedForms" RootWebOnly="TRUE"> <File Path="testform.xsn" Url="testform.xsn" Type="GhostableInLibrary" /> </Module> </Elements> |
Now you have three options. The first is good if you are not bothered about the content type that is used. If this is the case, you can ignore the creation of the content type from the start of this post. This is because if you deploy the form as part of a feature and specify the XsnFeatureReceiver class from the Microsoft.Office.InfoPath.Server assembly as the receiver, your form is automatically registered for web browsing and a suitable content type is created under the Microsoft Office InfoPath group with your form associated. The assembly and class values are shown below.
Receiver Assembly = Microsoft.Office.InfoPath.Server, Version=14.0.0.0, Culture=neutral, PublicKeyToken=71e9bce111e9429c
Receiver Class = Microsoft.Office.InfoPath.Server.Administration.XsnFeatureReceiver
When using this feature receiver, you’ll also have to add an activation dependency to your feature, otherwise the receiver may not fire. The dependency is for the InfoPath Forms Service support feature with the GUID C88C4FF1-DBF5-4649-AD9F-C6C426EBCBF5.
Activation Dependency
With the second method if you were to deploy the above content type and then the form with the XsnFeatureReceiver feature receiver, not only will your form be registered, but your content type will also be enabled for displaying the form in the browser. This is only the case if your content type directly inherits from the Form content type. If your content type is once removed then this step will fail.
The last method is for content types that do not directly inherit from the Form type.
Add an event handler to the feature that deploys your form, this will remove the reference to any existing receiver that you may be referencing.
Add the Microsoft.Office.InfoPath.Server.dll assembly to your project.
Next add the following using declarations:
using System; using System.Collections.Generic; using System.IO; using System.Runtime.InteropServices; using System.Security.Permissions; using Microsoft.SharePoint; using Microsoft.SharePoint.Administration; using Microsoft.SharePoint.Utilities; using Microsoft.SharePoint.Security; using Microsoft.Office.InfoPath.Server.Administration; |
This feature will implement the FeatureInstalled, FeatureActivated and FeatureUninstalling events. On installation we will register all forms that are being deployed as part of your feature. The activated event will update the content type to allow web rendering and uninstalling will unregister the forms from the site collection.
The installed method is shown below.
public override void FeatureInstalled(SPFeatureReceiverProperties properties) { base.FeatureInstalled(properties); FormsService formsService = GetFormsService(); if (formsService == null) { throw new ArgumentNullException("formsService", string.Format("Unable to retrieve FormsService during installation of \"{0}\". Argument formsService was null."), properties.Feature.Definition.Name); } // Get list of form templates that are being deployed as part of this feature. IEnumerable<String> formTemplates = GetInfoPathFormTemplates(properties.Definition.RootDirectory); foreach (string formTemplate in formTemplates) { if (formsService.FormTemplates.ItemFromFile(formTemplate) == null) { FormTemplateCollection.RegisterFormTemplate(formTemplate, properties.Definition, false); } } } |
This method gets the FormsService using a custom private method which we’ll come to later. The FormsService object allows you to access the currently registered forms.
Next we call the GetInfoPathFormTemplates method, which again is a custom private method. This method returns a generic list of paths to the forms that are referenced in your feature. As with the previous method, I’ll show this later.
The last step of this event is to call the static method RegisterFormTemplate of the FormTemplateCollection class. The full namespace for this class is Microsoft.Office.InfoPath.Server.Administration. This method will register the form on the farm.
The uninstall event is very similar but this time unregisters the forms.
public override void FeatureUninstalling(SPFeatureReceiverProperties properties) { base.FeatureUninstalling(properties); FormsService formsService = GetFormsService(); if (formsService == null) { throw new ArgumentNullException("formsService", string.Format("Unable to retrieve FormsService during uninstallation of \"{0}\". Argument formsService was null."), properties.Feature.Definition.Name); } // Get list of form templates that were deployed as part of this feature. IEnumerable<String> formTemplates = GetInfoPathFormTemplates(properties.Definition.RootDirectory); foreach (string formTemplate in formTemplates) { if (formsService.FormTemplates.ItemFromFile(formTemplate) != null) { formsService.FormTemplates.UnregisterFormTemplate(formTemplate, properties.Definition); } } } |
The main difference here is that to unregister we don’t call a static method of FormTemplateCollection but instead call the UnregisterFormTemplate method of the FormTemplates property contained in the FormsService object that was retrieved at the start of the method.
The two methods used by the installing and activated events are shown below:
private IEnumerable<String> GetInfoPathFormTemplates(string featureRootPath) { FileInfo[] filesInfo = new DirectoryInfo(featureRootPath).GetFiles("*.xsn"); List<String> infoPathFormFileSpecs = new List<String>(); foreach (FileInfo fileInfo in filesInfo) { infoPathFormFileSpecs.Add(Path.Combine(fileInfo.DirectoryName, fileInfo.Name)); } return infoPathFormFileSpecs; } private FormsService GetFormsService() { FormsService formsService; if (SPFarm.Local != null) { formsService = SPFarm.Local.Services.GetValue<FormsService>(FormsService.ServiceName); } else { formsService = SPContext.Current.Site.WebApplication.Farm.Services.GetValue<FormsService>(FormsService.ServiceName); } return formsService; } |
GetInfoPathFormTemplates looks in the root path of the feature for any file with the xsn extension and returns the path information.
GetFormsService attempts to get the FormsService object from the local farm, first by referencing the SPFarm object directly. Where this is null, it tries to retrieve it from SPContext.
The last piece of code to complete the registration is for the activated event. Here we will be updating a custom content type, twice removed from the Form type.
private const string MINIMALACTIVEXTOOPEN = "SharePoint.OpenXmlDocuments.2"; public override void FeatureActivated(SPFeatureReceiverProperties properties) { SPSite site = properties.Feature.Parent as SPSite; SPWeb currentWeb = site.RootWeb; // Update the custom content type to allow rendering in web browser. SPContentType ct = currentWeb.ContentTypes[new SPContentTypeId("0x0101010076AEDEA7CA2A44B59ECB3D491618E05200726740CD03C4478FB0897E6993DDE8D0")]; if (ct.NewDocumentControl != MINIMALACTIVEXTOOPEN || ct.RequireClientRenderingOnNew) { ct.NewDocumentControl = MINIMALACTIVEXTOOPEN; // Ensure the RequireClientRenderingOnNew property is correctly set for web browsing. ct.RequireClientRenderingOnNew = false; // Don't forget to update the content type with the changes. ct.Update(true, false); } } |
As this example feature is scoped to site level, we only need to cast the Parent object to SPSite.
Using the root SPWeb object the custom content type is retrieved by its identifier. This could just as easily be a collection of content types, but for this example we are only updating one.
The two properties that are being updated are NewDocumentControl and RequireClientRenderingOnNew.
NewDocumentControl identifies the application used to create new document, which for InfoPath forms should be set to “SharePoint.OpenXmlDocuments.2”.
The second property, RequireClientRenderingOnNew will have already been defined in the content type markup, but it’s worthwhile making sure at this stage, otherwise you won’t be able to view the form in the web browser.
Now when you activate the feature you will have an InfoPath form, with code-behind, that is able to be viewed in the browser. Remember that for this to work you will require the Enterprise version of SharePoint.