
Setting up a development environment for SharePoint is relatively straight forward when it comes to on premise solutions. Everything is running on the same server and normally on one IIS website.
Moving to a hybrid model, be that either SharePoint or Provider hosted requires some extra configuration. More so for provider-hosted as you need to configure DNS entries. Specifically, you’ll need to define domains for:
| Usage | DNS | Description |
|---|---|---|
| SharePoint Portal | spportal.com | Standard DNS entry and certificate |
| Host Web | spportaladdin.com | Forward lookup zone entry for hosting provider-hosted add-ins |
| Host Web | *.spportaladdin.com | Wilcard alias (CNAME). Each add-in when activated provisions a unique DNS domain name. Wildcard Canonical Name is required to support this. |
For a development environment, adding DNS entries mat not be possible depending on how much access you have to fully administer the server. It’s also unnecessary for writing and testing add-ins locally. Other users, tester, etc., should not be accessing your development server for testing. That’s what UA environments are for, so it may be easier to bypass this configuration and setup the dev server to work without DNS entries.
Installing SharePoint is a fairly straight forward process, especially for a development server. I won’t go into this for the post but the following gives a good description on how to install a single server SharePoint intsance – https://docs.microsoft.com/en-us/sharepoint/install/install-sharepoint-server-2016-on-one-server
Creation of host web domain
To create the host web domain, we’re simply going to add an entry to the hosts file
- Go to C:\Windows\System32\drivers\etc
- Open the file called hosts in a text editor
- Add an entry to the bottom of the file
- 127.0.0.1 spportaladdin
- Save the changes
Disable Loopback checks
To allow all browsing to the server from IIS on which it’s hosted by using any host-header, we need to disable loopback checks in the registry.
- Open the registry editor – C:\Windows\regedit.exe
- Browse to the following folder
- HKEY_LOCAL_MACHINE\SYSTEM\CurrentControlSet\Control\Lsa
- Add a new DWORD entry with the key – DisableLoopbackCheck
- Modify it and set the value to 1
- Reboot the machine to ensure the changes are applied
Create the Host Web
Now lets create the host web in IIS
- Open IIS Manager
- Optionally create a new application pool for the host web
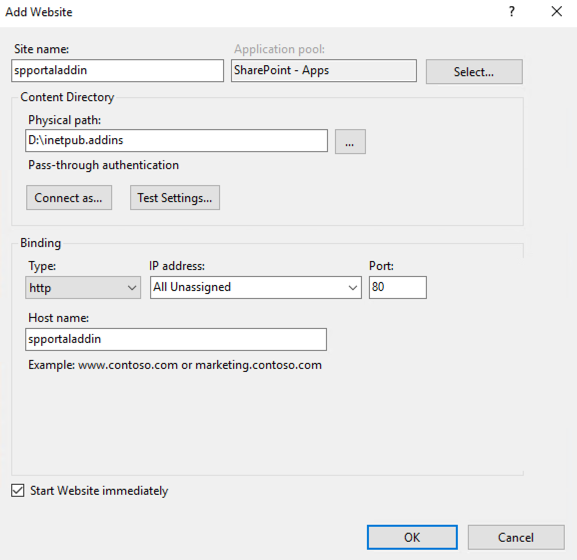
- After this, right click Sites and select Add Website
- Enter whatever site name you like
- Change the application pool to the one you created above or simply choose the one used by your main SharePoint web application
- Set a location for this new web site
- I created mine one level below where SharePoint creates them
- C:\inetpub\wwwroot\wss\hostweb
- Add the domain created in the hosts file above into the Host Name input box.
- In this case – spportaladdin.com
- Click OK to apply the changes.
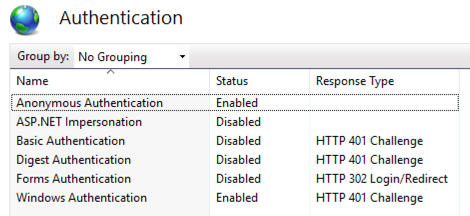
Once created, go to the Authentication setting for the new website. From here, set Anonymous and Windows authentication to Enabled.
Now we need to grant permission to the host web’s folder for the application pool
- In Windows Explorer, go to the parent folder of the website you just created
- Right click the website’s folder then choose Properties
- Switch to the Security tab
- Click the Edit button near the top of the page
- Now click Add
- In the dialog that appears, click the Locations button
- Ensure the computer is selected here and then click OK
- Enter the application pool account in the text box
- Taking the example above, to add ‘SharePoint – Apps’, I’d enter:
- IIS AppPool\SharePoint – Apps
- Click OK to add the account
- With the account highlighted, set the permissions to:
- Read & Execute
- List folder contents
- Read
- Click OK to apply the changes
Service Applications
Now we need to create two service applications. We need the Application Management and Subscription Settings services.
Before creating the services, ensure the Microsoft SharePoint Foundation Subscription Settings Service has auto provisioning set to Yes. If not, click Enable Auto Provisioning
- Open Central Administration
- Click ‘Manage Services in this Farm’. Located under the System Settings heading
- Verify auto provisioning is enabled and set to on if it’s not

After setting above, use the following PowerShell to create the two services:
# Change this to the managed service account you use for your services
$account = Get-SPManagedAccount "domain\setupaccount"

# Optionally create application pools for both services
# Alternatively use the default application pool
# $appPool = Get-SPServiceApplicationPool -Identity "SharePoint Web Services Default"
$appPoolSubSvc = New-SPServiceApplicationPool -Name 'Subscription App Pool' -Account $account
$appPoolAppSvc = New-SPServiceApplicationPool -Name 'App Management App Pool' -Account $account

# Change the Name and DatabaseName to whatever you like
$appSubSvc = New-SPSubscriptionSettingsServiceApplication -ApplicationPool $appPoolSubSvc -Name 'Subscription Settings Service' -DatabaseName SettingsServiceDB
$proxySubSvc = New-SPSubscriptionSettingsServiceApplicationProxy -ServiceApplication $appSubSvc

$appAppSvc = New-SPSubscriptionSettingsServiceApplication -ApplicationPool $appPoolAppSvc -Name 'Application Management Service' -DatabaseName AppServiceDB
$proxyAppSvc = New-SPSubscriptionSettingsServiceApplicationProxy -ServiceApplication $appAppSvc
Once the above has completed you should now see two new services listed in the Manage Service Applications page:
- Application Management Service & its proxy
- Subscriptions Settings Service & its proxy
Configure Environment for Add-Ins
Now the required services are up and running, we now need to configure the farm for add-ins. You can do this via Central Administration or PowerShell.
For Central Administration, go to the /_admin/ConfigureAppSettings.aspx page and enter the domain and prefix values:
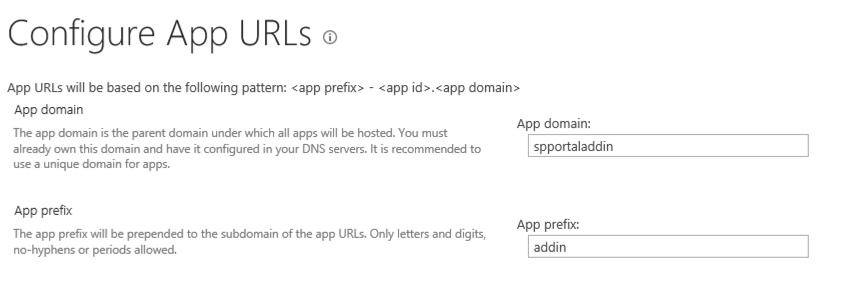
Using PowerShell, simply run the following two commands:
Set-SPAppDomain -AppDomain spportaladdin
Set-SPAppSiteSubscriptionName -Name addin -Confirm:$false
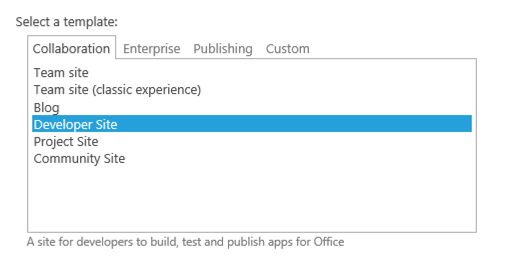
For development purposes, you should only need to create development site to deploy and test the add-ins you develop. To create one, simply create a new site in Central Admin based on the Developer Site template:
Nothing wrong with also creating the app catalog for the web application too, if you want to test deploying the add-ins to different test site collections that you create. To do this, you need to go to the Manage App Catalog page in Central Admin – /_admin/ManageCorporateCatalog.aspx
From here, select Create a new app catalog site and provide the title, description and URL like you would when creating any other site collection.
To do the above with PowerShell:
# Change the Url and OwnerAlias to match your environment
New-SPSite -Url http://yourservername/sites/AppCatalog -OwnerAlias "domain\setupaccount" -Name "App Catalog site" -Template "APPCATALOG#0
One last thing you should do before you’re able to start debugging and deploying custom add-ins is to configure the trusted certificate with SharePoint. To do this, follow the post here.
Your SharePoint server should now be up and running and ready for you to deploy your first add-in to it. The following is a post detailing how to create and deploy a fairly simple provider-hosted add-in.